

Protect Your Apple ID with a Security Key
- YubiOnstaff
- Feb 6, 2023
- 9 min read

January 23rd (local time), Apple released the latest update for iOS, iPadOS, and macOS. This release supports physical authentication device security key as two-factor authentication for Apple ID. When signing in with Apple ID, after entering the password, a 6-digit verification code is displayed on the trusted device (iPhone, iPad, macOS device), and security was strengthened by entering the verification code.
This time, I will introduce "What is the advantage of using security keys?", "What are the conditions of use?", "What kind of security key should I choose?", "How to set it?", "How to authenticate?".
Table of Contents
Precautions
About inquiry For inquiries about security keys, don't hesitate to get in touch with us using our contact form. If you have any questions about setting up your Apple ID, please contact Apple.
About account recovery after setting the security key We recommend that you should register at least two security keys. One should be kept in a safe place as a backup, and you can use it in case your main key was lost. If you lose all your security keys, you could be locked out of your Apple ID account permanently.
Disclaimer We do not guarantee any problems regarding the security key setting for Apple ID protection. Please make the settings at your own risk.
Advantages of using security keys
The bottom line is that using physical security keys for two-factor authentication can prevent a variety of attacks, including phishing attacks.
Phishing attacks often use email or SMS to redirect users to fake sites to steal Apple IDs, passwords, and verification codes. If you use a security key as your second factor, you'll use the security key every time you authenticate, protecting you from attacks.
Recently, it has become a convenient world where you can do anything with just a smartphone, but the number of cases of being victimized by such attacks is increasing. So it is recommended for those who want more robust security.
Conditions of use of security key
To use a security key as two-factor authentication for your Apple ID, the following conditions must be met.
Have at least two FIDO® Certified* security keys for Apple devices. → Details are explained in the "How to choose a security key" section.
iOS 16.3, iPadOS 16.3, or macOS Ventura 13.2 or later installed on all devices that you sign in with your Apple ID. → Refer to here for details on compatible devices.
You have set Two-factor authentication for Apple ID. If you have to enter a verification code when logging in with your Apple ID, it means two-factor authentication has already been set.
WebAuthn-compatible browsers such as Safari, Chrome, Edge, and Firefox can be used. (The latest version is recommended.)
※ Please check here for which the security key cannot be used with an Apple ID.
How to choose a security key
As introduced on Apple's official page, the security key used for two-factor authentication of Apple ID must be compatible with "FIDO". "YubiKey (by Yubico)", which is also introduced on Apple's official page, supports FIDO and can be selected according to the interface of the Apple device to be used. We are an authorized reseller of Yubico and sell YubiKeys. If you are looking for it, please purchase it from the YubiKey shop or Amazon.
Click here to find your Mac port.
List of YubiKeys

The upper YubiKey 5 series is a model that supports multiple protocols (OTP, PIV, OpenPGP, etc.) including FIDO. The Security Key series in the middle row is a relatively inexpensive model that supports the FIDO protocol only. The YubiKey Bio series at the bottom is the only biometric authentication model and supports the FIDO protocol.
If you are using an iPhone, we recommend NFC-compatible ones (those with NFC in the product name). YubiKey 5Ci is recommended when connecting to an iPhone, iPad, or macOS device.
About FIDO Security Key
FIDO is a highly secure authentication method that uses public key cryptography and is characterized by its robust phishing resistance. I won't go into the detailed technical specifications here. Among the FIDO protocols, there are differences in security key operation depending on whether FIDO2 or FIDO U2F is supported, so I will briefly explain the differences.
FIDO U2F
FIDO U2F is designed to act as a second factor of authentication. For example, after entering a password, it is used to confirm possession by a touch operation of the security key. However, it does not confirm the fingerprint-by-touch operation but confirms that you have it to the last.
FIDO2
FIDO2 is designed to work as passwordless while remaining compatible with FIDO U2F. For example, after entering the ID, insert the security key and confirm the PIN or biometric. FIDO2 enables two-factor authentication based on possession and knowledge or inherence with a single security key.
(All YubiKeys introduced in this article support FIDO2.)
If you have a security key that supports FIDO2, please refer to the next section "Set up the security key" to add a PIN or enroll your fingerprint.
※ When logging in with an Apple ID, the behavior changes depending on whether the PIN for the security key is set or not. Those with a PIN will work as FIDO2, and those without a PIN will only require the touch of the security key.
Set up the security key
FIDO2-compatible security key does not have a PIN set in the initial state. Please set the security key PIN based on the setting information below. You can enroll your fingerprint for the biometric key after setting the PIN.
If you are using a macOS device, please refer to the following page: FIDO2 Security Key PIN Setting / Fingerprint Setting - for macOS
If you are using a Windows device, please refer to the following page: FIDO2 Security Key PIN Setting / Fingerprint Setting - for Windows
※ When logging in with an Apple ID, the behavior changes depending on whether the PIN for the security key is set or not. Those with a PIN will work as FIDO2, and those without a PIN will only require the touch of the security key.
How to set up the security key
Before setting the security key, prepare two security keys.
※ For information on purchasing a security key, refer to How to choose a security key".
Note:
About security key registration: When registering a security key, if the registration process takes too long or the NFC response is poor, the error message "This security key cannot be registered" may appear. In that case, please try again.
About using the verification code: After setting a security key, the security key is required for two-factor authentication. You will no longer be able to authenticate with the verification code that you have been using. If all security keys are deleted, it will revert to verifying with a verification code.
About account recovery after security key setting: We recommend that you should register at least two security keys. One should be kept in a safe place as a backup, and you can use it in case your main key was lost. If you lose all your security keys, you could be locked out of your Apple ID account permanently.
About security key reset: The FIDO2 security key will be locked if the PIN is incorrect 8 times in a row. In that case, you will need to reset the security key. After resetting, you will lose all the authentication information you have registered so far, so you will need to set it again.
The setting is explained according to the Apple device you are using.
How to set up on iPhone or iPad
In this article, "YubiKey 5 NFC" and "YubiKey 5Ci" are used.
1. Open "Settings".

2. Tap your username.

3. Tap "Password & Security".

4. Tap "Add Security Keys".

5. Tap "Add Security Keys".

6. Tap "Continue".

7. Enter your iPhone passcode.

8. Connect your security key and touch the button. Or hold the NFC-compatible security key over it.


※ In the case of YubiKey 5Ci, there are small metal parts on the left and right, and it reacts when touched there. Even with other security keys, the button part is blinking, so I think you won't get lost too much.
9. Enter the "PIN" set for your security key. ※ If your security key is not set a PIN, this process will be skipped and only the touch of the security key will be required. (See About FIDO Security Key)

10. After entering the PIN, a message will be displayed. So touch your security again. Or hold your security key over it.
※ The message will not be displayed if the NFC is held up.

11. Enter any name for your security key.

12. Since registration of the second key starts, connect your security key and touch the button. Or hold the NFC-compatible security key over it.

※ In the case of YubiKey 5Ci, there are small metal parts on the left and right, and it reacts when touched there. Even with other security keys, the button part is blinking, so I think you won't get lost too much.
13. Enter the "PIN" set for your security key. ※ If your security key is not set a PIN, this process will be skipped and only the touch of the security key will be required. (See About FIDO Security Key)
14. After entering the PIN, a message will be displayed. So touch your security again. Or hold your security key over it.

15. Enter any name for your security key and proceed to the next step.

16. Finally, check the device associated with your Apple ID and select one of the following:
Stay signed in to all devices.
Select devices that you don't want to continue to have access to your account and sign out of them.

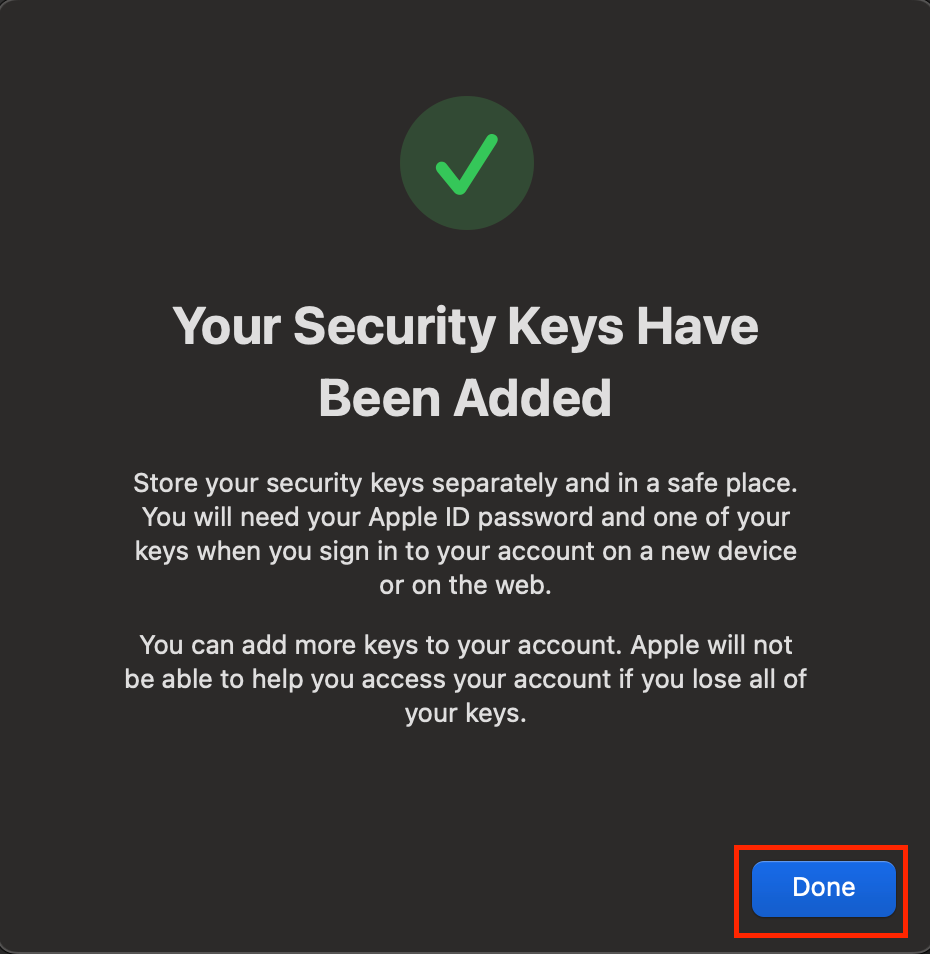
17. Click "Done" to finish the operation.

The security key setting is complete.
For the authentication method, please check the "How to authenticate the security key" section.
How to set up on Mac
This article uses "YubiKey 5Ci" and "YubiKey Bio - FIDO Edition". The first is registered by connecting YubiKey 5Ci and entering a PIN. And the second is registered by connecting YubiKey Bio - FIDO Edition and biometrics (fingerprint).
※ This time, for the sake of explanation, we are testing a pattern of PIN and biometrics (fingerprint).
1. Click "System Settings..." from the Apple menu.

2. Click your username, and click "Password & Security".

3. Click "Add..." on the right side of the Security Keys component.

4. Click "Add Security Keys".

5. Click "Continue".

6. Enter your Mac passcode.

7. Click "Continue".

8. Connect your security key, and touch the button.


※ In the case of YubiKey 5Ci, there are small metal parts on the left and right, and it reacts when touched there. Even with other security keys, the button part is blinking, so I think you won't get lost too much.
9. Enter the "PIN" set for your security key. ※ If your security key is not set a PIN, this process will be skipped and only the touch of the security key will be required. (See About FIDO Security Key)
※ If you are using a biometric (fingerprint) key, there is no need to enter a PIN.

10. After entering PIN, the following message will be displayed, so touch the button of the connected security key.

11. Enter any name for your security key and click "Continue". ※ Proceed to the next step after pressing the Return key in the input field.

12. Click "Continue".

13. Connect your security key, and touch the button.
※ The second key registration is described as a biometric (fingerprint) key registration. If you are using a non-biometric key, the operation is the same as the first registration.


※ For the YubiKey Bio, touch the fingerprint sensor in the middle (you should touch the fingerprint sensor and its edge ring).
14. Enter any name for your security key and click "Continue". ※ Proceed to the next step after pressing the Return key in the input field.

15. Finally, check the device associated with your Apple ID and select one of the following:
Stay signed in to all devices.
Select devices that you don't want to continue to have access to your account and sign out of them.

16. Once completed, you will see the message below. Click "Done" to finish the operation.
The security key setting is complete.
For the authentication method, please check the "How to authenticate with a security key" section.
How to authenticate with a security key
This time, I will use an iPhone and take an iCloud login as an example.
(The authentication flow is the same for Mac.)
Note
Authentication may fail if the authentication operation takes a long time. Specifically, if it takes a long time to complete the authentication operation (touch operation, PIN input, fingerprint confirmation) after the security key is requested, authentication may fail.
1. Enter your Apple ID end password.

2. Tap "Continue".

3. Connect your security key and touch the button. Or hold the NFC-compatible security key over it.


4. Enter the "PIN" set for your security key. ※ If your security key is not set a PIN, this process will be skipped and only the touch of the security key will be required. (See About FIDO Security Key)
※ If you are using a biometric (fingerprint) key, there is no need to enter a PIN.

5. Touch your security button again. Or hold the NFC-compatible security key over it.

6. Choose whether to trust the browser or not.
Don't trust: Require two-factor authentication every time.
Trust: If you trust it, it won't require two-factor authentication when you log in on that device for 30 days.

7. Login completed.

FAQ
Why is "Add Security Keys" not displayed in "Password & Security"?
Please check "Conditions of use of security key". If the setting items are not displayed even though the conditions are met, please contact Apple.
An error message is displayed when registering the security key and registration is not completed. What should I do now?
When registering a security key, if the registration process takes too long or the NFC response is poor, the error message "This security key cannot be registered" may appear. In that case, please try again.
What is the maximum number of security keys that can be set?
Up to 6 keys can be registered.
Can I go back to using the verification code?
By deleting all security keys, it is possible to return to verification code authentication.
My security key is blocked. What should I do?
FIDO2 security keys will be blocked if the PIN is incorrect 8 times in a row. In that case, you will need to reset your security key. After resetting, you will lose all the authentication information you have registered so far, so you will need to set it again. For security key setting, see "Set up the security key".
What happens if I lose all my security keys?
If you lose all your security keys, Apple cannot help you access your account. So keep your backup key safe.
Authentication using the security key fails. What should I do?
There are several reasons for authentication failure, please check below:
The authentication operation is taking too long: Specifically, if it takes a long time to complete the authentication operation (touch operation, PIN input, fingerprint confirmation) after the security key is requested, authentication may fail.
Check if the security key is connected halfway.
If you are using a USB hub, try connecting it directly to your device and check.
Your security key is blocked: After 8 consecutive failed PIN attempts, the security key will be blocked. Please check "My security key is blocked. What should I do?".
I forgot my security key PIN. What should I do?
If you forgot your PIN, you will need to reset your security key. As a precaution, after you reset your security key, all authentication information will be lost, so you will need to set it up again. For security key setting, see "Set up the security key".


