

Deploying YubiOn Portal SSO on the Citrix StoreFront
- Shiraishi
- May 25, 2022
- 4 min read
The previous article introduced the Windows logon mechanism to the Citrix desktop delivery environment, a basic function of YubiOn Portal. This article will discuss the implementation of SSO for the first login to StoreFront when using Citrix Desktop Delivery and protecting StoreFront with two-factor authentication.
Note: The Citrix Gateway may be in charge of authentication depending on the product configuration. StoreFront may not authenticate as long as the authentication has been completed at the Gateway. In that case, a different configuration method may be required.
■ Machine Configuration
The machine configuration and authentication flow are as follows:

Now, change the StoreFront login settings to look as follows:

Register SSO settings for YubiOn Portal and SAML authentication settings for the Citrix server.
■ StoreFront HTTPS conversion
Proceed with the installation of StoreFront, as StoreFront is running on HTTP instead of HTTPS. However, if the settings are changed from HTTP to HTTPS after setting up SSO, the integration setting of YubiOn Portal will require modification. Thus, it is recommended to change StoreFront to HTTPS first, then proceed with the HTTPS conversion according to the help on Citrix's website.
If HTTPS in IIS is first configured and StoreFront functionality is installed, all settings will be properly configured as HTTPS. Thus, it is recommended to delete StoreFront, configure HTTPS in IIS, and then reconfigure StoreFront.
■ YubiOn Portal Settings①
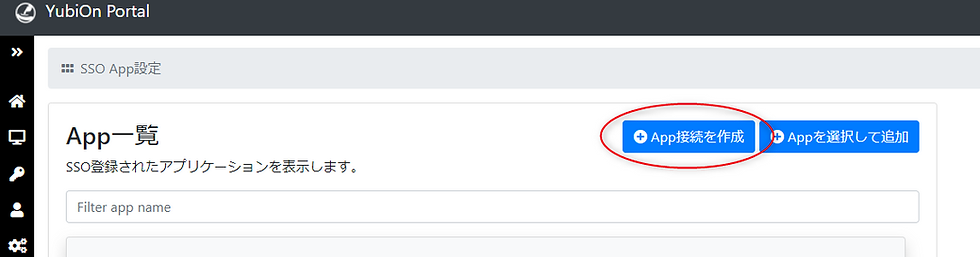
From this point on, working on the Citrix server is recommended because the main work is exchanging SSO metadata configuration files with the Citrix product. First, create one SSO App setting on the YubiOn Portal side.
The information required as an IdP (IdP login URL, IdP entity ID, certificate, etc.) is determined. Eventually, SP information on YubiOn Portal will need to be registered, but for now, simply download the metadata as an IdP.

This is all that needs to be done on YubiOn Portal at this point; after the Citrix product has been configured, it can be configured again on the YubiOn Portal.
■ Citrix StoreFront configuration
The next step is configuring Citrix StoreFront, either in the StoreFront tree of Citrix Studio or in the Citrix StoreFront Settings application, to use SAML authentication. Here, Citrix Studio one is used.

Click on "Manage Authentication Methods" in the appropriate store.

When the Manage Authentication Method window opens, check the "SAML Authentication" checkbox and click OK.

The user can proceed if "SAML Authentication" is added to the "Authentication Method" in the Store Overview column.
From here, one can load metadata from YubiOn Portal into StoreFront. Metadata-related operations are not prepared in GUI tools, so one must configure them using PowerShell commands. Open PowerShell with administrator privileges and execute the following commands.
asnp citrix.*
$StoreVirtualPath = "(StorePath)"
$Store = Get-STFStoreService -VirtualPath $StoreVirtualPath
$Auth = Get-STFAuthenticationService -StoreService $Store
Update-STFSamlIdPFromMetadata -AuthenticationService $Auth -FilePath "(MetadataFilePath)"
Set-BrokerSite -TrustRequestsSentToTheXmlServicePort $true
※Store path: "/Citrix/(store name)
※Metadata full path: Full path of the metadata file downloaded from YubiOn Portal
Please leave the PowerShell window open as it will be reused later. After executing the commands, the necessary information for the ID provider setting for SAML authentication has been set in Citrix Studio.

Although there are no specific settings other than loading metadata, the login URL and certificate for YubiOn Portal are set.

Next, retrieve the metadata that contains the StoreFront side settings. In the PowerShell window where the commands were entered, execute the following commands in succession.
(New-Object System.Uri $Auth.Routing.HostbaseUrl, ($Auth.VirtualPath + "/SamlForms/ServiceProvider/Metadata")).ToString()As a result of the execution, a URL where StoreFront metadata can be obtained will be output, so access the URL with a browser to obtain the file.
■ YubiOn Portal Settings②
To load StoreFront metadata into YubiOn Portal, perform SP metadata upload on YubiOn Portal's SSO setting screen.

Select the StoreFront metadata file just obtained, following which a confirmation dialog will appear, where the metadata can be uploaded.

If you check the application settings, you will see that StoreFront information is set.
On checking the application settings, the set StoreFront information can be viewed.

Next, modify the User ID Value setting as necessary; StoreFront requires the AD account's UPN (User Principal Name) as the User ID Value (NameID). If the registered member's email address is the same as the UPN, then there is no problem if the "Member Email Address" is set in the "Member Information" section. If a different email address than the UPN is registered, please set the UPN to be sent to StoreFront by creating an item for the UPN address in the member properties.
Finally, set up the members who can use the SSO application. Use the member assignment and group assignment functions in the lower right corner of the settings screen to assign the necessary users to access the SSO application.
■ Confirmation of Operation
Now, check the actual operation.
In addition, StoreFront does not support IdP-Initiated (method of performing SSO login from the application list of YubiOn Portal). Access the StoreFront WEB access URL (default is the URL with "Web" after the store URL).

Once the StoreFront screen is displayed, one will immediately be redirected to the YubiOn Portal login screen.

After entering the email address, enter the YubiOn Portal login password and YubiKey OTP.

The screen will then change and the screen after the StoreFront login will be displayed.

When the desktop is opened, the YubiOn Portal logon screen appears as before, and the user is prompted for two-factor authentication at login.


